2022.11.07
VOCALOID6 Setup guide for Apple Logic Pro
This article will explain how to use VOCALOID6 in Logic Pro project. If you use VOCALOID6 in a Logic Pro project,
you can also save VOCALOID6 information into the Logic Pro project.
In addition, as Logic Pro supports ARA2 (Audio Random Access) function, it is possible to link VOCALOID6 in Logic Pro projects with the Logic Pro project.
1.Start Logic Pro in Rosetta mode
If you are using a Mac with Apple silicon, such as the M1 chip, you will need to use Logic Pro in "Rosetta mode."
If you are using an Intel Mac, this setting is not required. Proceed to step 2.
First, please quit Logic Pro. Right-click the [Logic Pro] icon in the application folder and click [Get Info] from the menu.
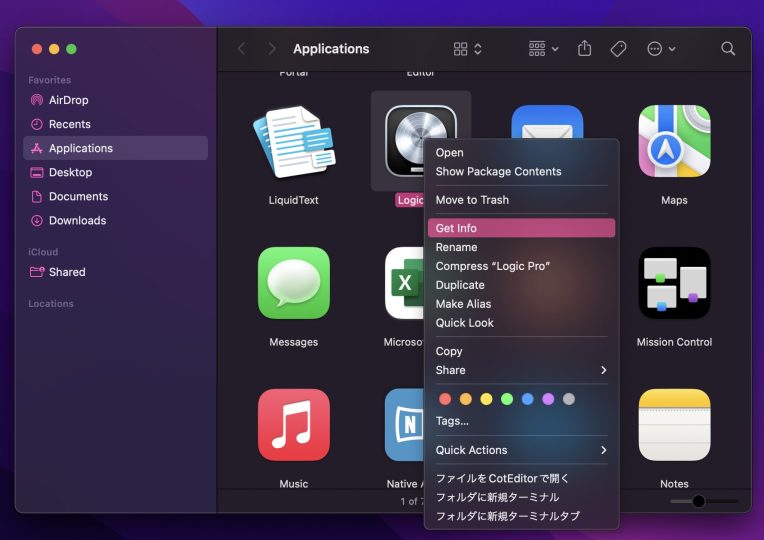
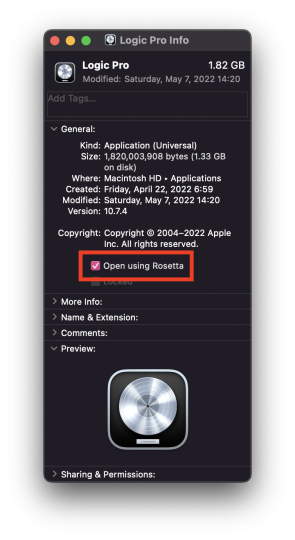
Check [Open using Rosetta] in the information window of Logic Pro. Then, close the window.
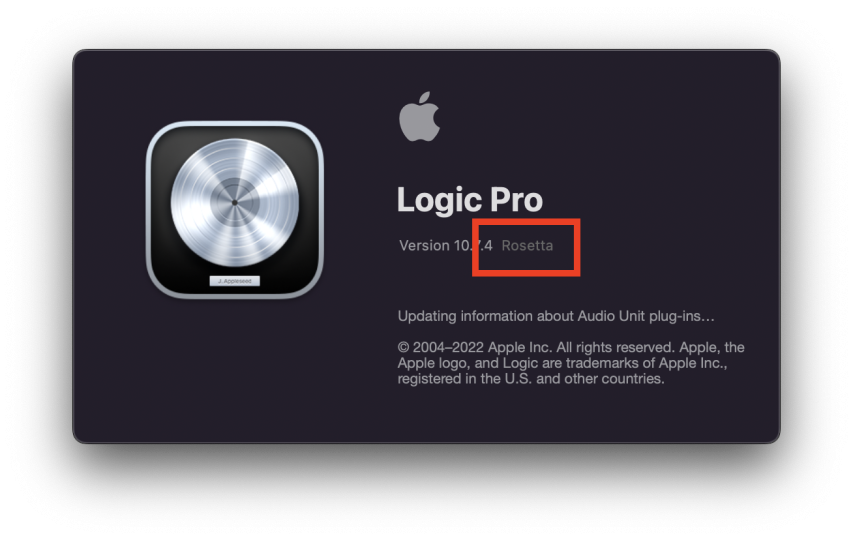
Start Logic Pro. When starting in the Rosetta mode, "Rosetta" is displayed on the right side of the startup screen.
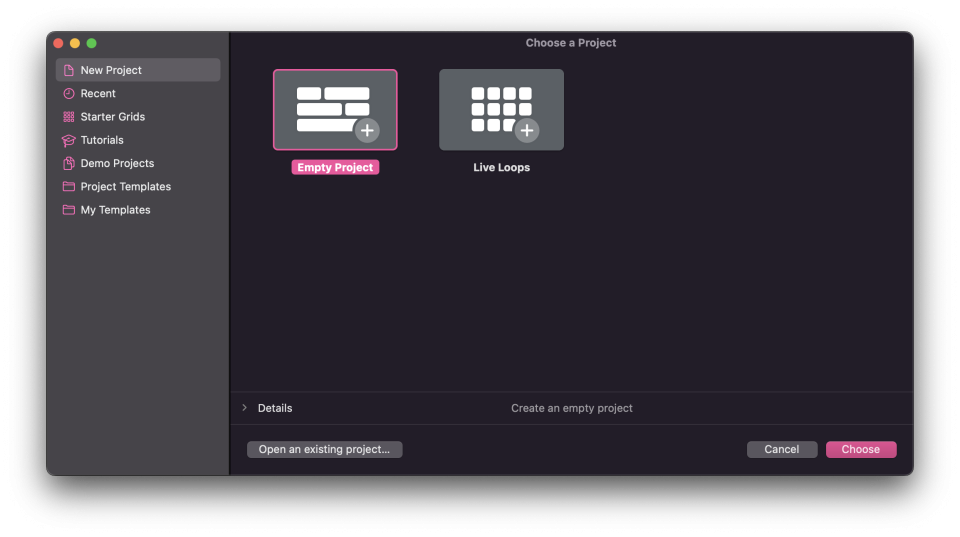
2. Start Logic Pro and create a project
Start Logic Pro and create a project. To create an blank project, select [Create Blank Project].
3. Start VOCALOID on the software instrument track.
When the project starts, the [Select Track type] window will appear. Select [Software Instrument].
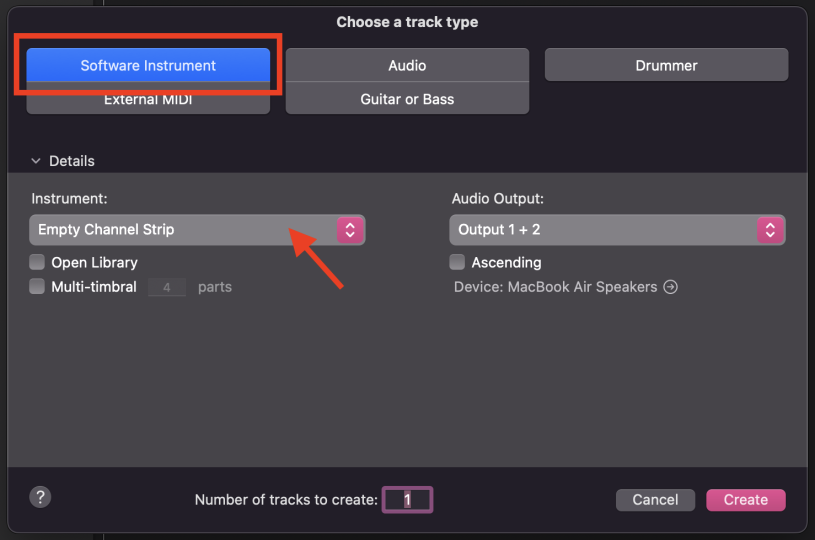
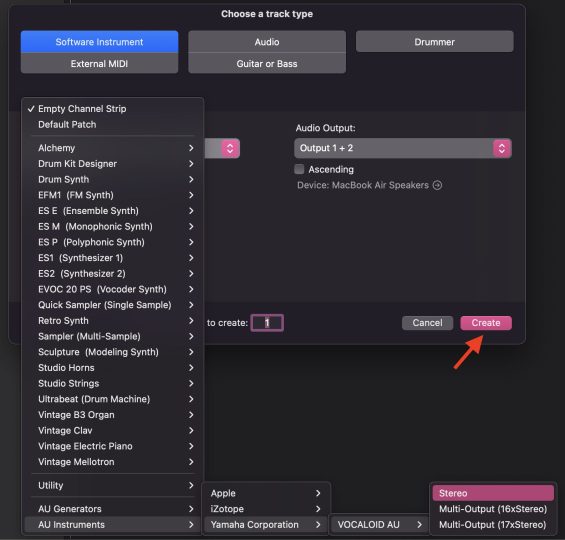
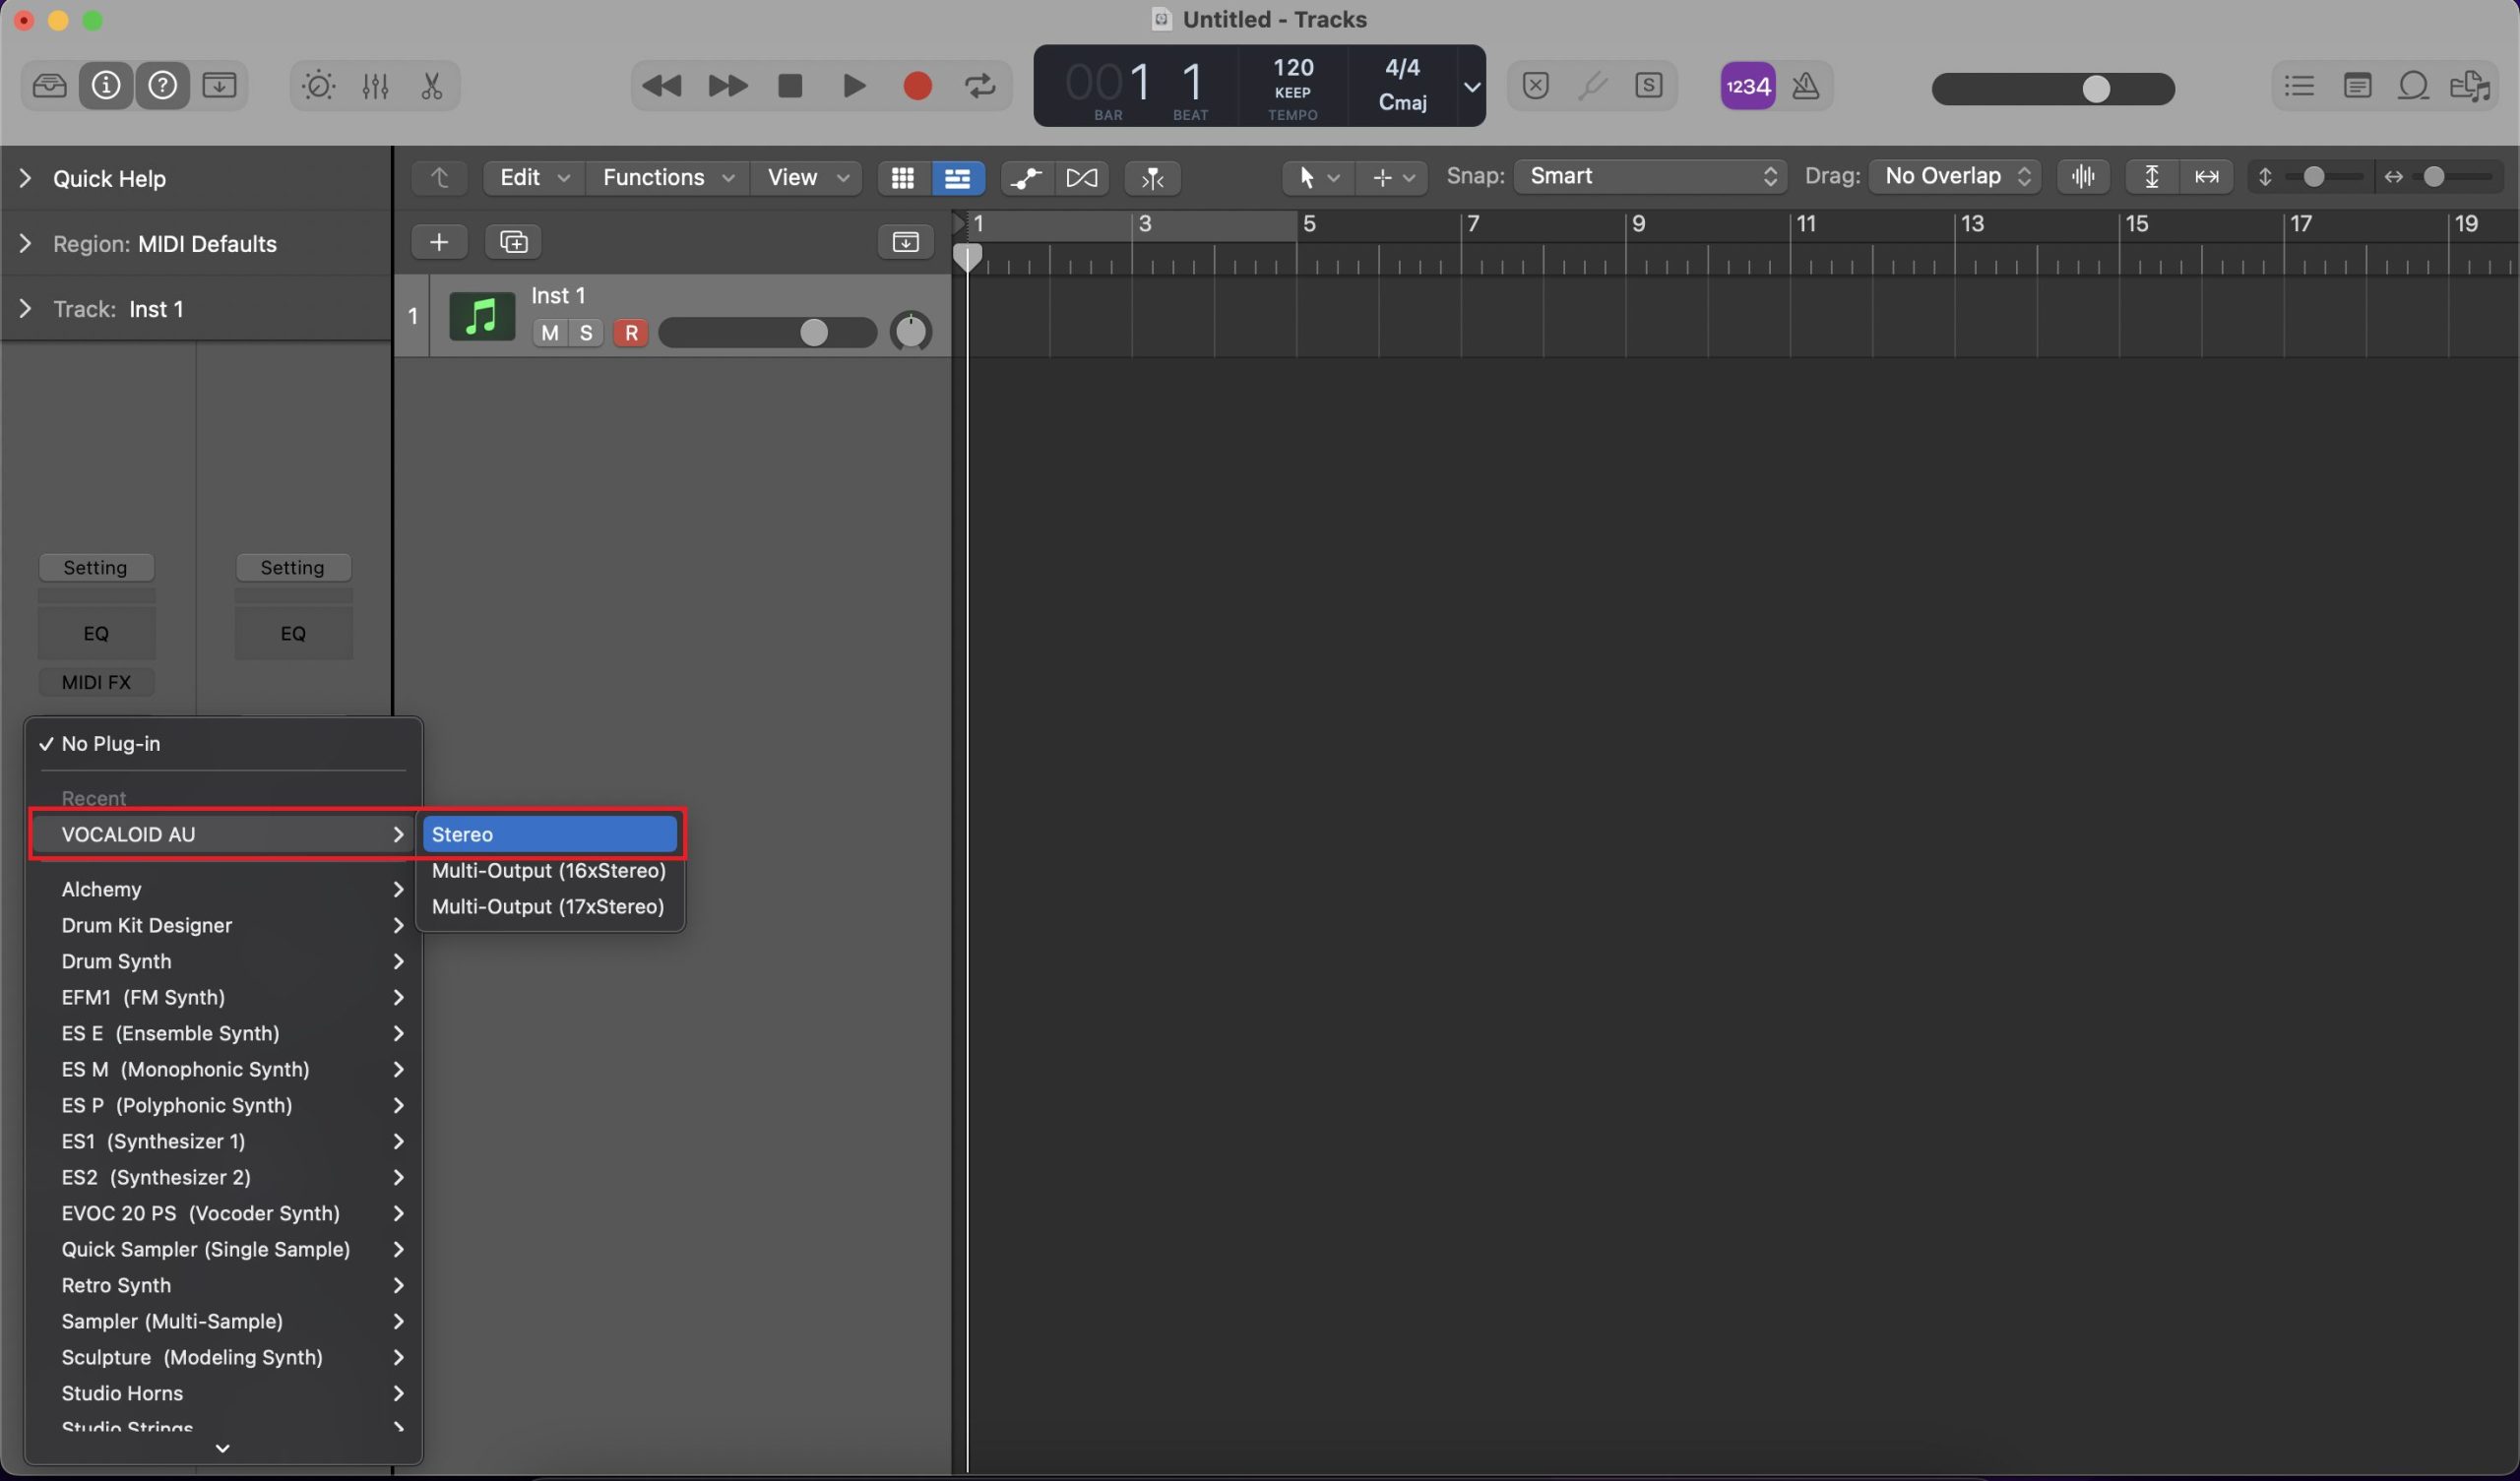
Click the menu of [Instruments:] in the details and select [AU Instruments > Yamaha Corporation > VOCALOID AU > Stereo]. Then, click [Create] button.
4.Configure VOCALOID Bridge
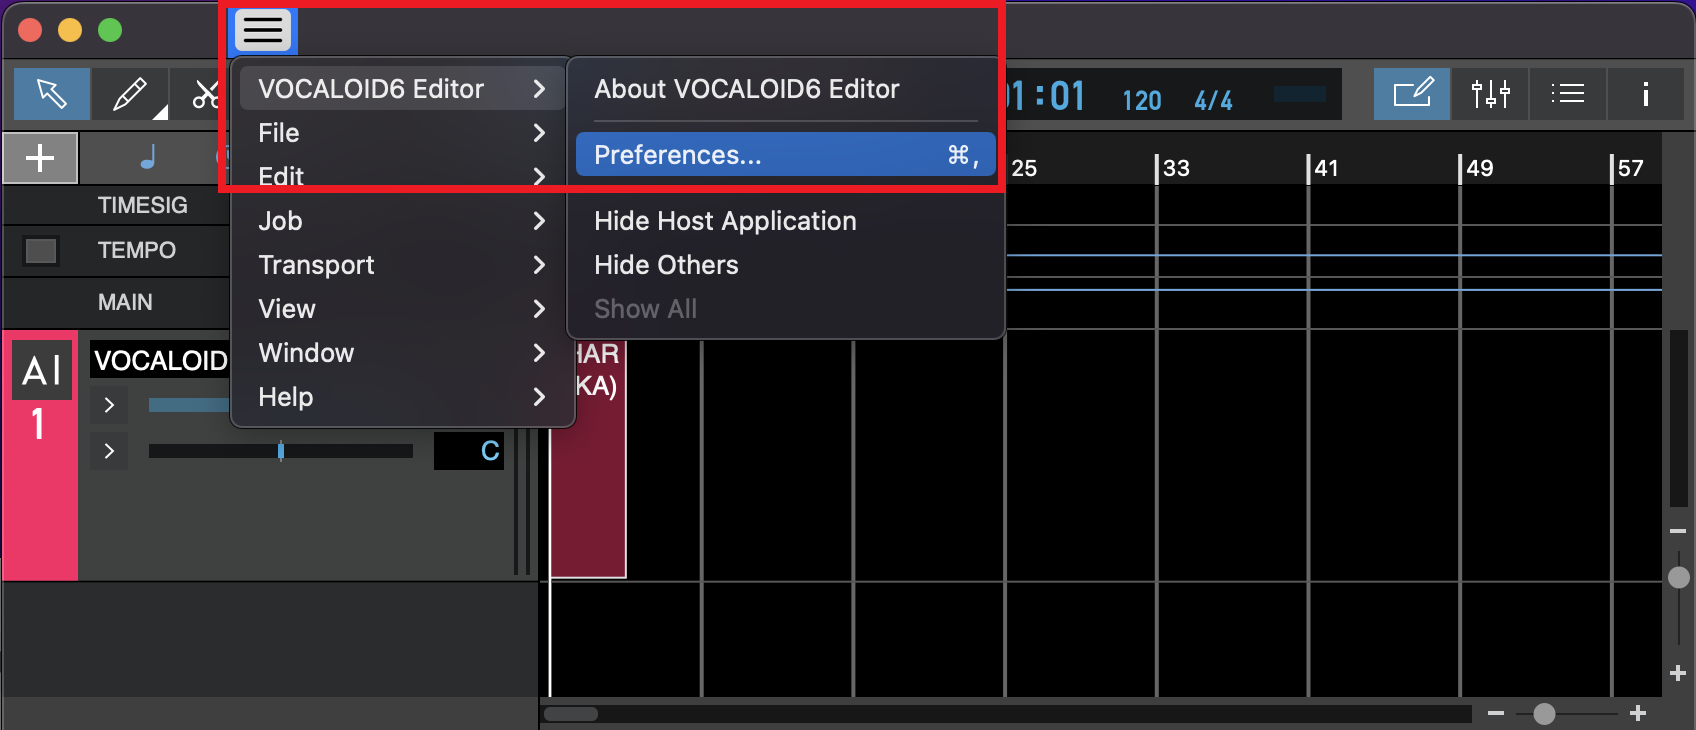
On the VOCALOID AU instrument that has launched in previous step, select [Menu > VOCALOID6 Editor > Preferences].
Place a check in "Allow connection with VOCALOID Bridge plug-in" under "Details," and then reload the VOCALOID AU plug-in.

Close Preferences pop-up. Then, select [No Plug-in] from the instrument slot for re-loading. The VOCALOID AU instrument requires re-loading after changing preferences.
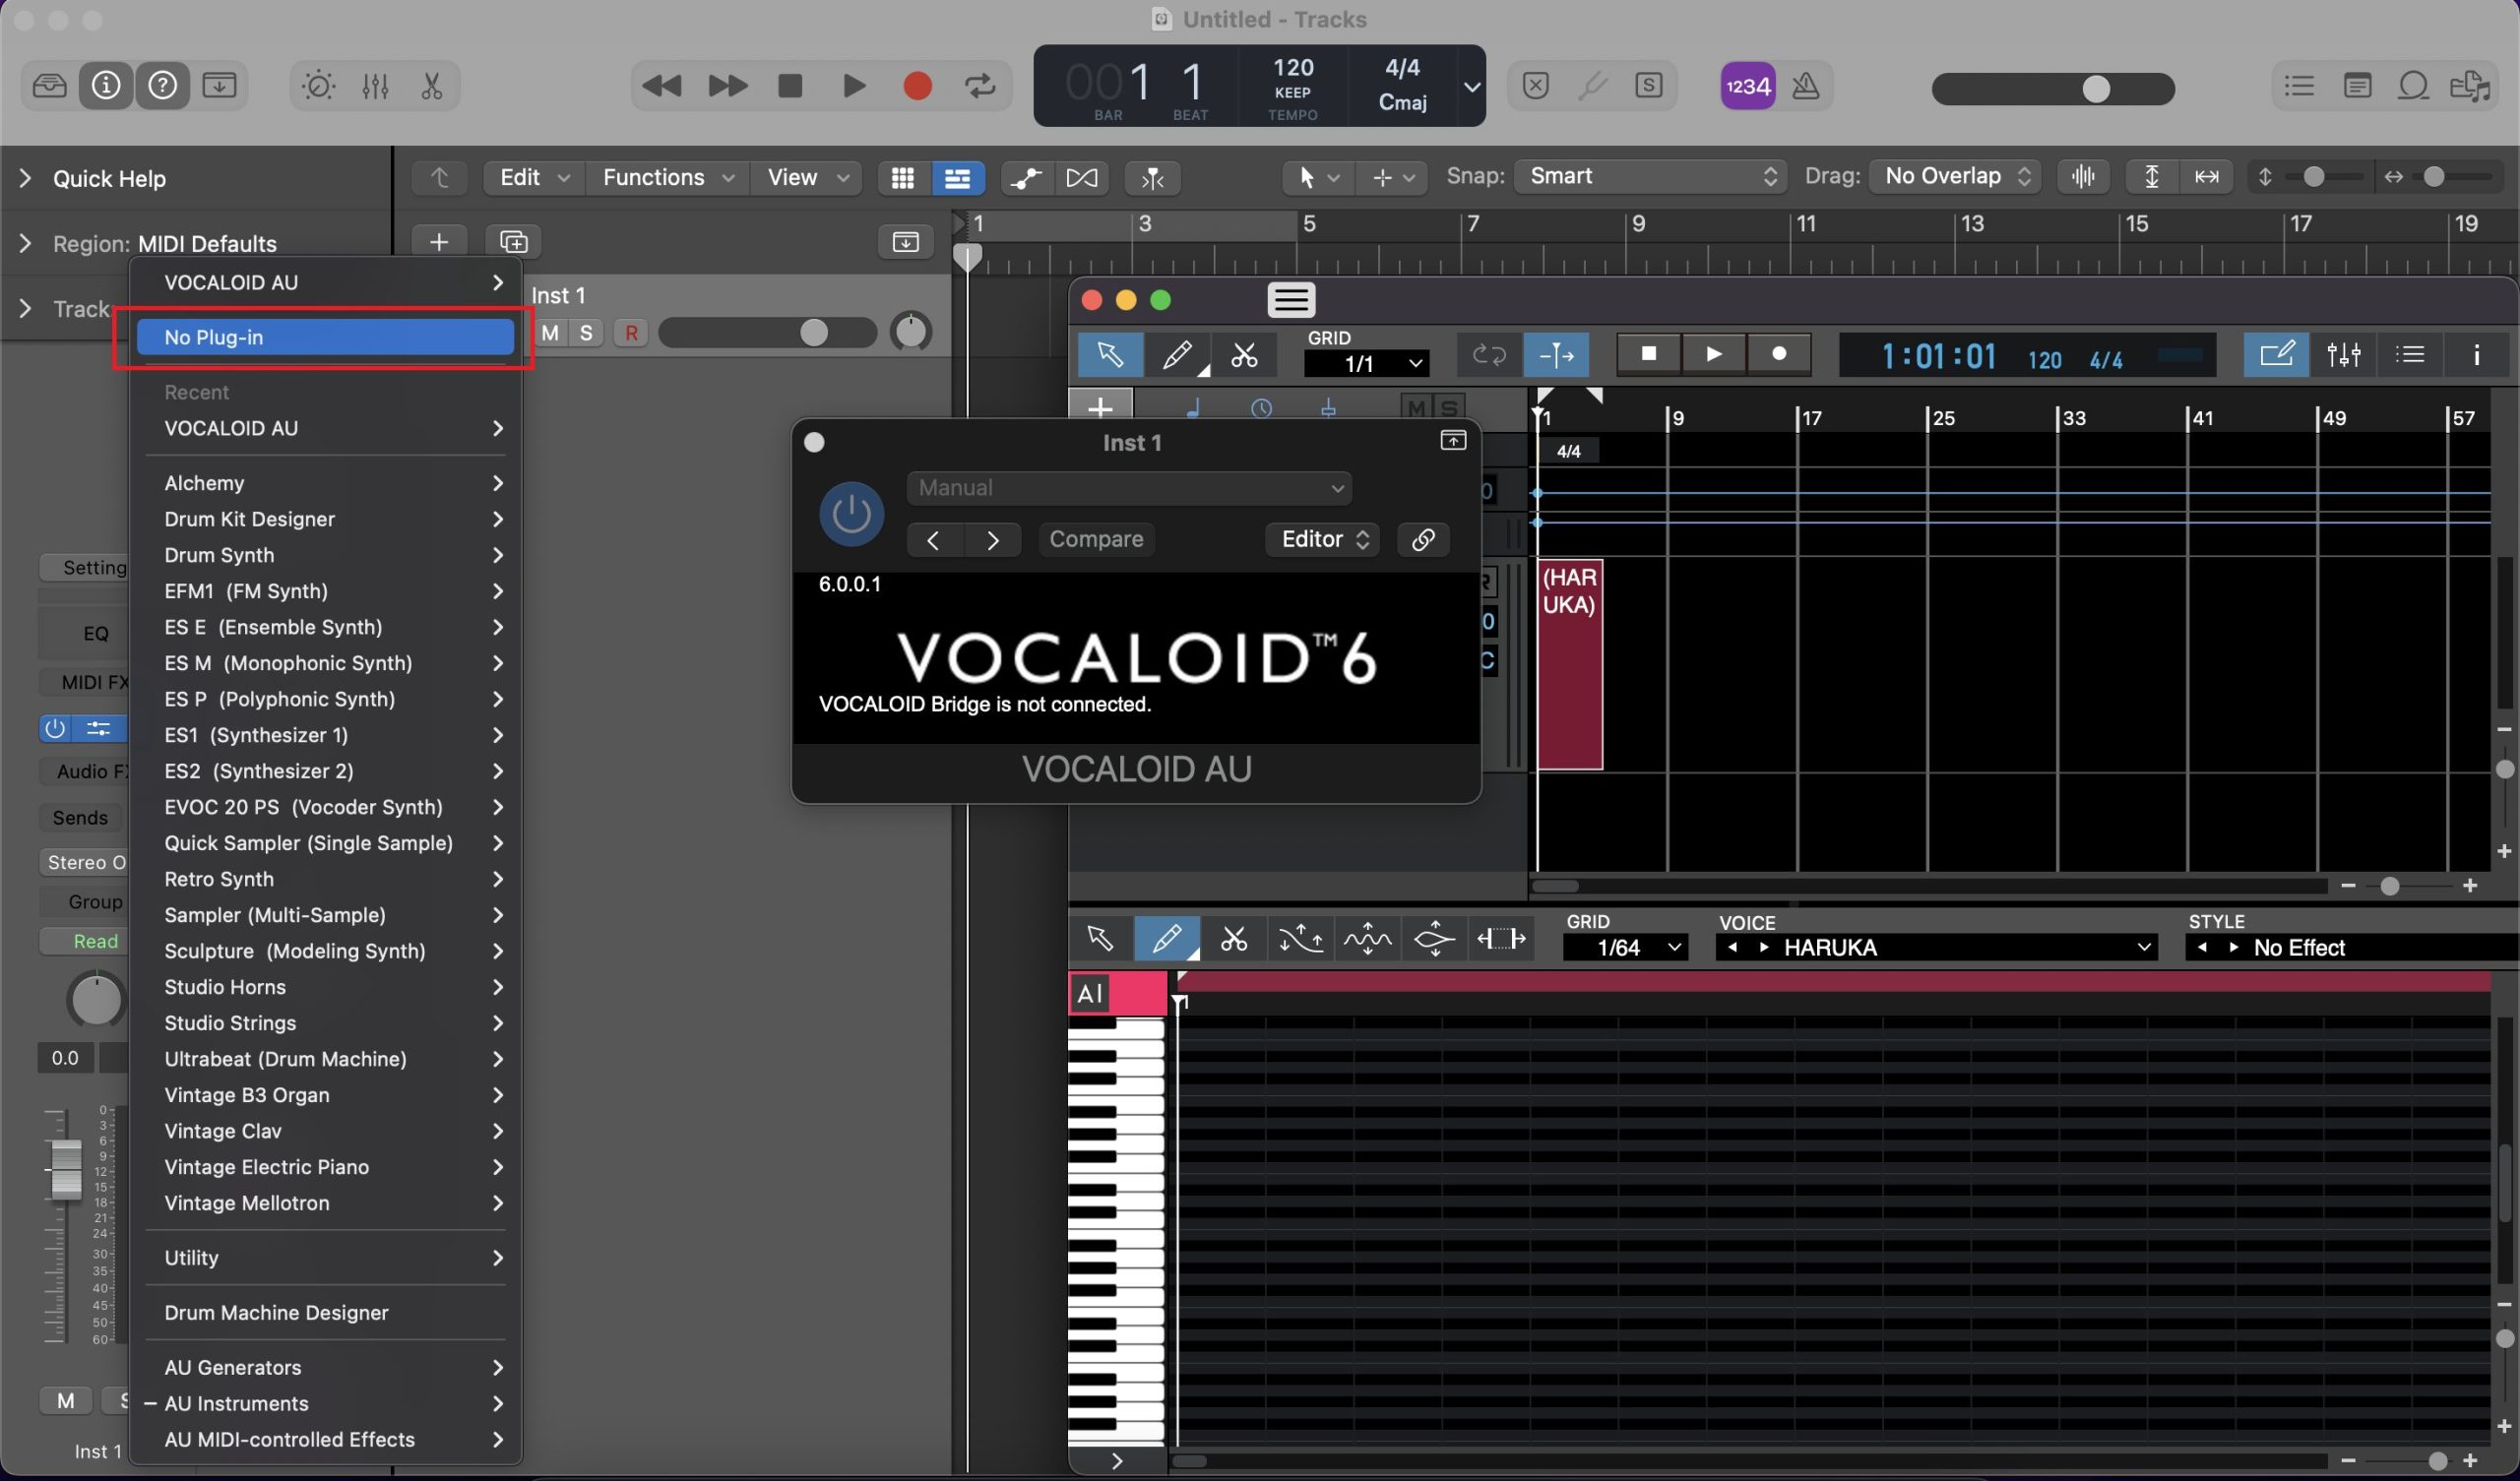
Select [VOCALOID AU > Stereo] from the instrument slot again for re-loading.
5. Configure ARA2
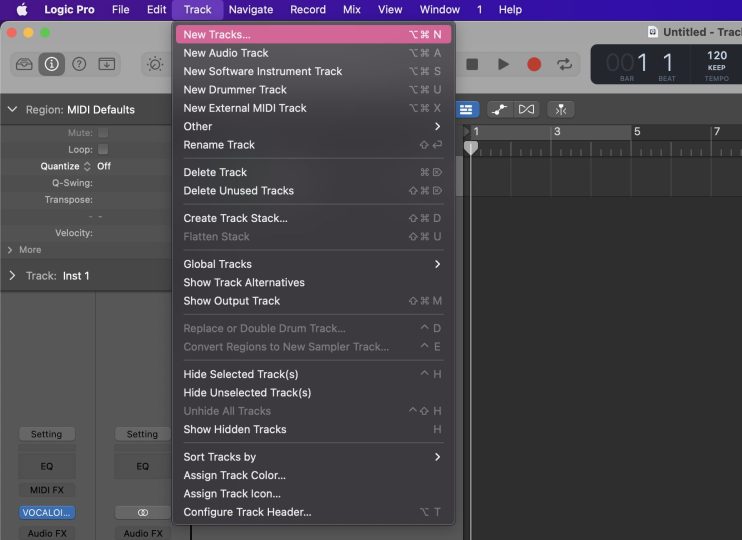
Next, let's set the "ARA2" to synchronize the transport between the Logic Pro and the VOCALOID. Create an audio track on Logic Pro. Select [Track > Add Audio Track].
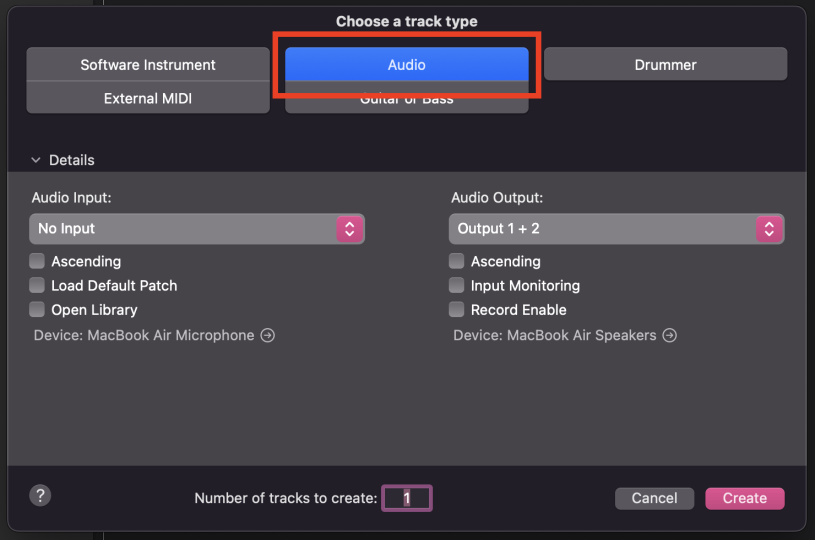
* It is also possible to select a new track and select [Audio] in the [Select Track Type] window. In that case, select [Use microphone or line input].
Open [Inspector] and [Mixer screen] from the buttons.
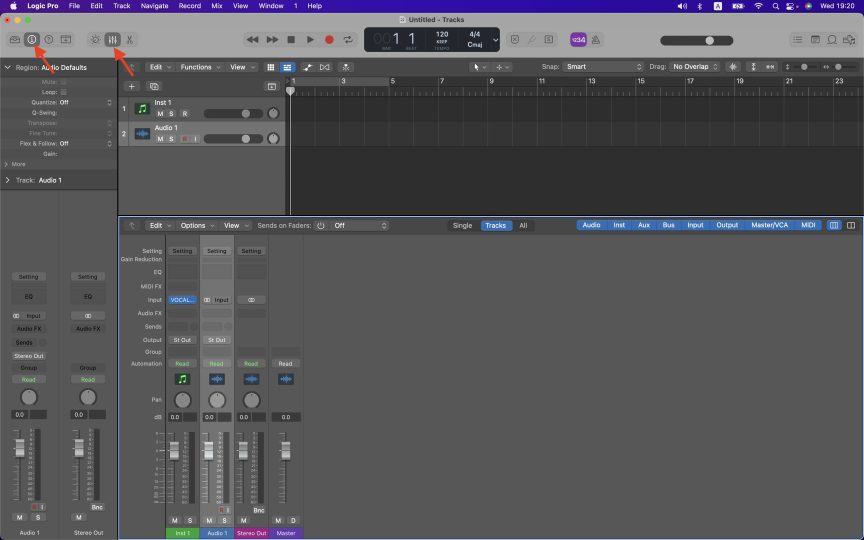
Click the topmost [Audio FX] slot of the created audio track, and select [AU sound source >Yamaha Corporation > VOCALOID Bridge AU (ARA) > Stereo (or Mono)].
* Be sure to select the topmost Audio FX slot. Please note that [VOCALOID Bridge AU(ARA)] cannot be selected if you select the second slot or subsequent slots.
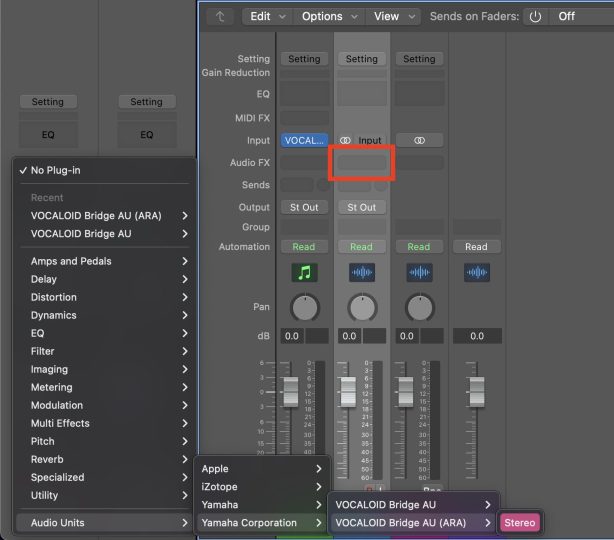
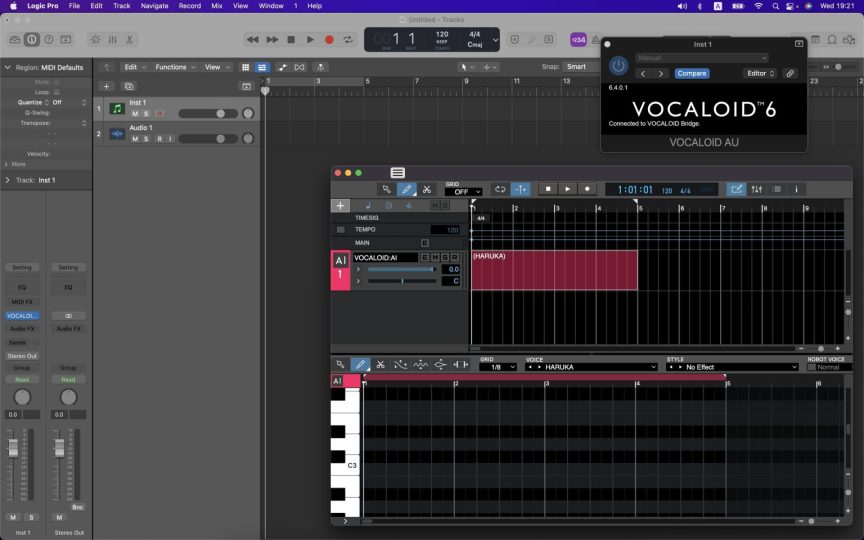
If the message "Connected to VOCALOID Bridge" appears on the VOCALOID AU instrument that created in step 3, the settings are completed.
6. Confirm operation
Lastly, let's check if VOCALOID and ARA2 are working properly.
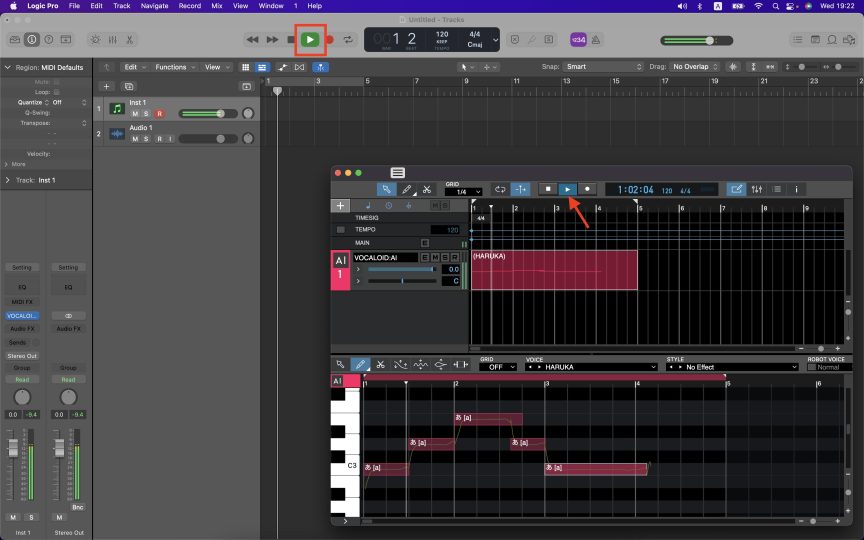
Play and stop the project by clicking the [Play] button in Logic Pro. Play and stop the VOCALOID in conjunction with Logic Pro.
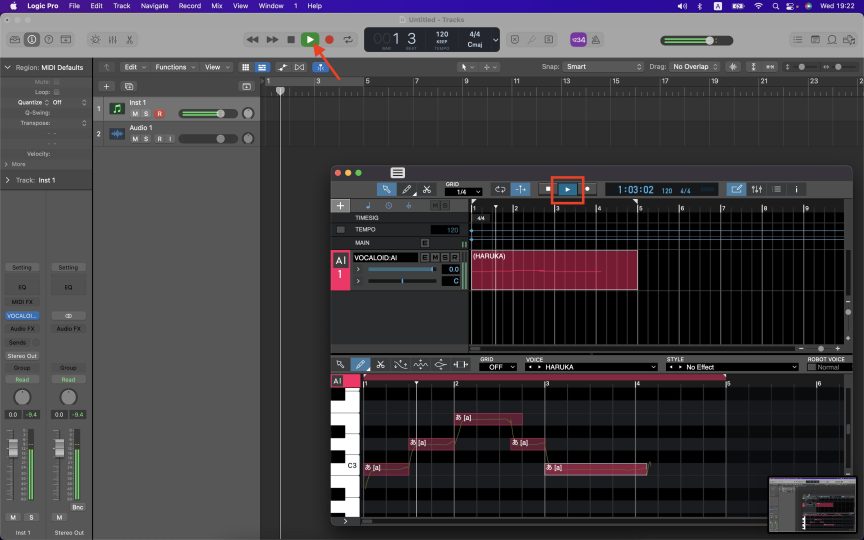
Then, click the [Play] button in the VOCALOID screen. Logic Pro also plays/stops in conjunction with VOCALOID.
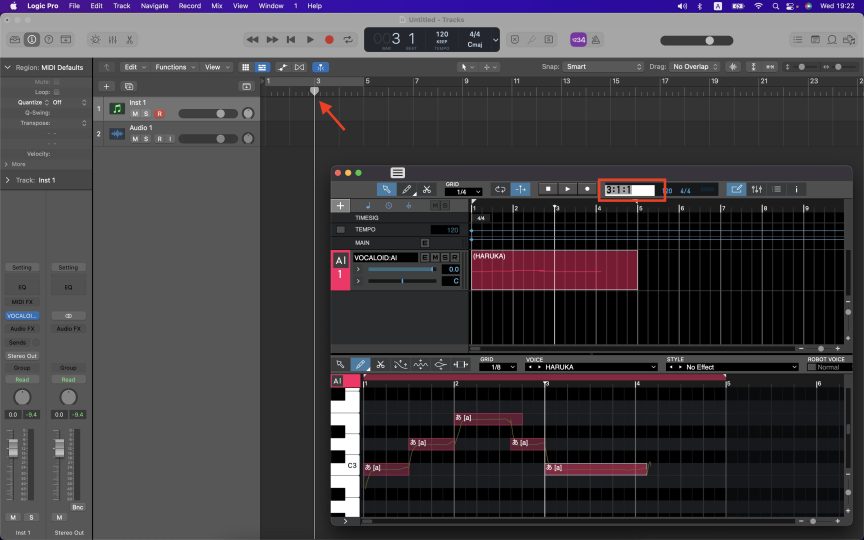
Let's change the playback position on the VOCALOID screen. In conjunction with VOCALOID, Logic Pro's playback position also follows.
The playback position can be moved by clicking the "Ruler (the part where 1, 2, 3, 4 and the number of bars are written)" at the top of the screen with the mouse. "
Let’s try changing the tempo in Logic Pro. The VOCALOID playback tempo will follow the tempo in Logic Pro.
Note : You cannot set the tempo in Logic Pro from the VOCALOID6. Please set the tempo in Logic Pro.

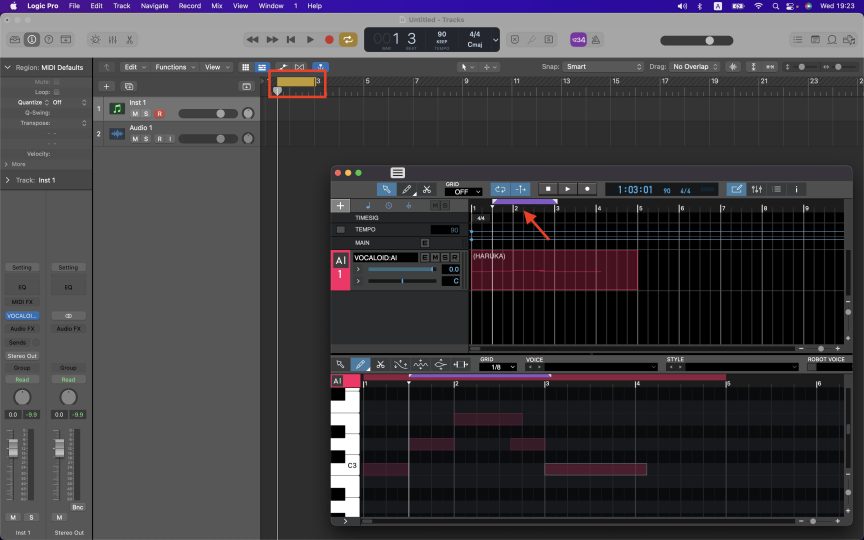
Use the start and end markers in the Ruler to select the repeat range. One the range has been selected, turn the [Repeat] button [ON (light)] and play it. VOCALOID and Logic Pro will play the selected range of bars repeatedly until stopped.
The settings for VOCALOID has been completed in Logic Pro.