2026.11.11
VOCALOID7 Setup guide for Apple Logic Pro
This article explains how to use VOCALOID7 in Logic Pro. Using VOCALOID7 within a Logic Pro project allows you to save VOCALOID7 data directly along with your Logic Pro project.
Logic Pro and VOCALOID7 Editor connect via ARA2 (Audio Random Access), a functionality that links different music production software. Since both software programs support ARA2, playback, stop, and other transport operations are synchronized.
Contents
1.Start Logic Pro in Rosetta mode
2. Start Logic Pro and create a project
3. Start VOCALOID on the software instrument track.
4.Configure VOCALOID Bridge
5. Configure ARA2
6. Confirm operation
1.Start Logic Pro in Rosetta mode
If you are using a Mac with Apple silicon, you need to run Logic Pro in "Rosetta mode."
- If you are using an Intel-based Mac, this setting is not required. Please proceed to Step 2.
First, quit Logic Pro.
Right-click the Logic Pro icon in the Applications folder, and click [Get Info] from the menu.
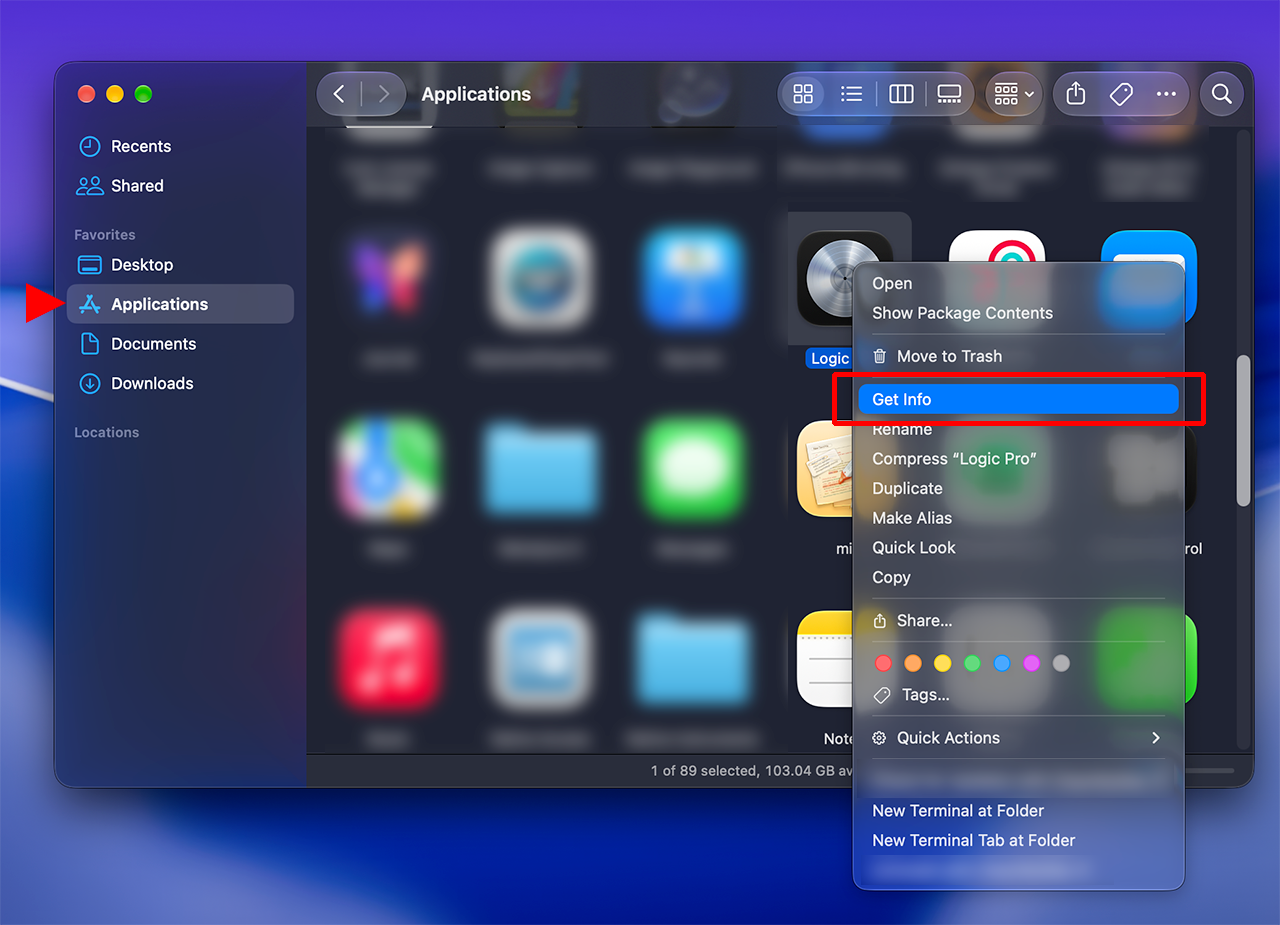
Check the box for [Open using Rosetta] in the Logic Pro Info window, and close the window.
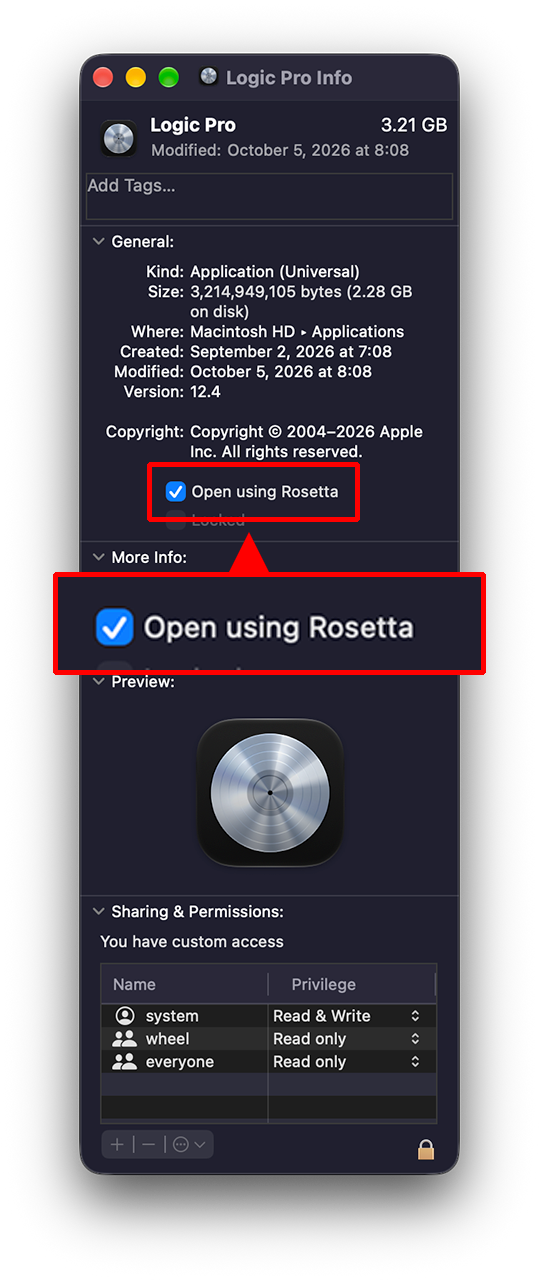
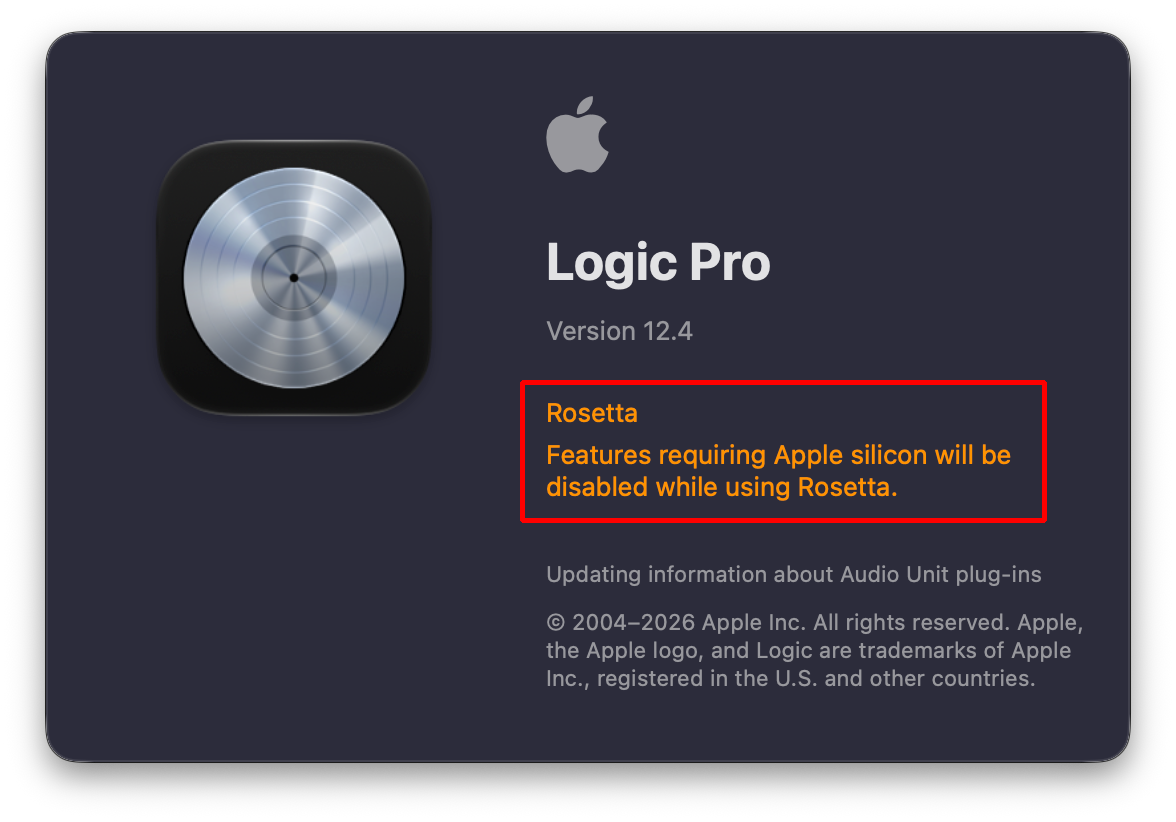
Launch Logic Pro. When running in Rosetta mode, "Rosetta" will appear on the startup screen.
2. Start Logic Pro and create a project
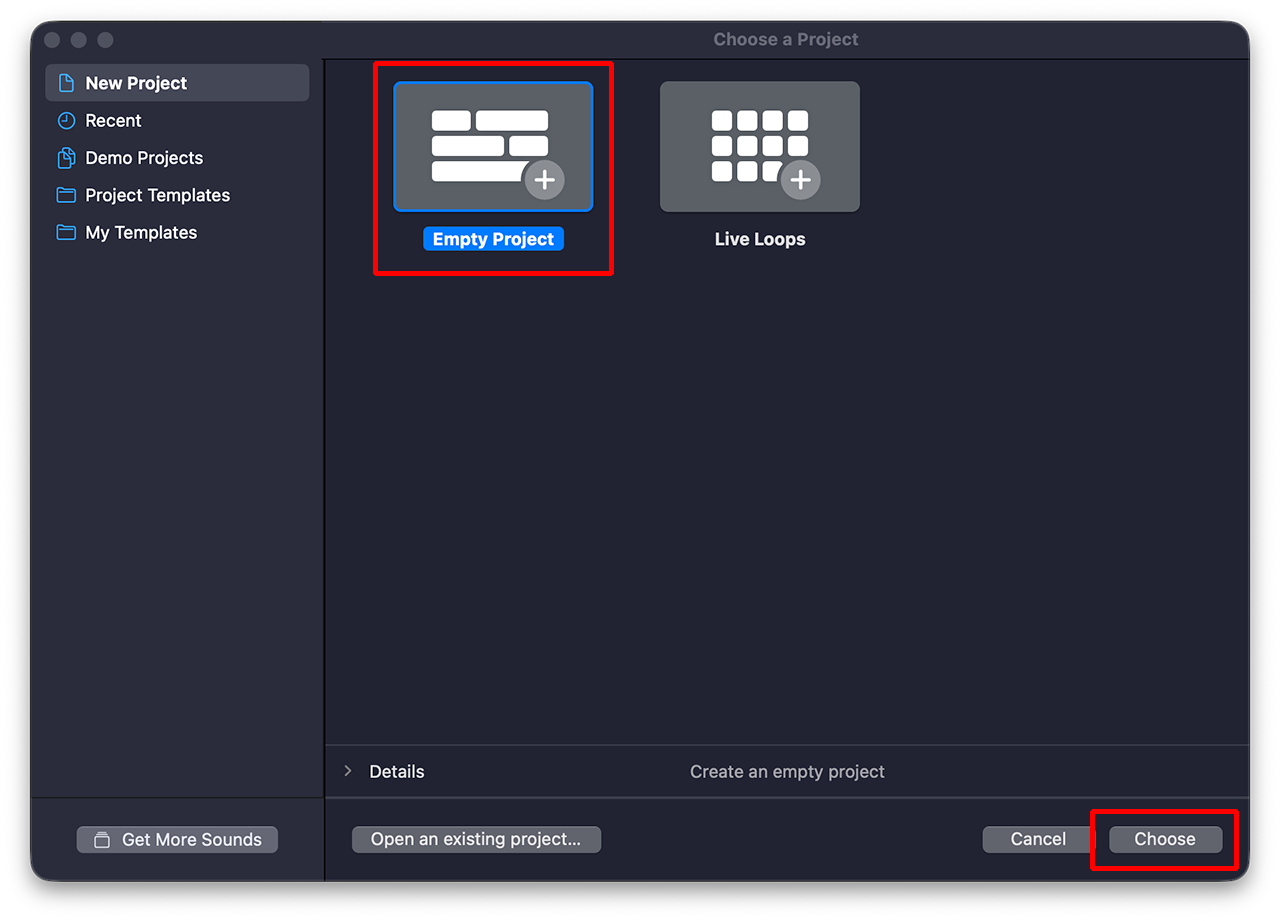
Launch Logic Pro and create a test project. Select [Empty Project].
3. Start VOCALOID on the software instrument track.
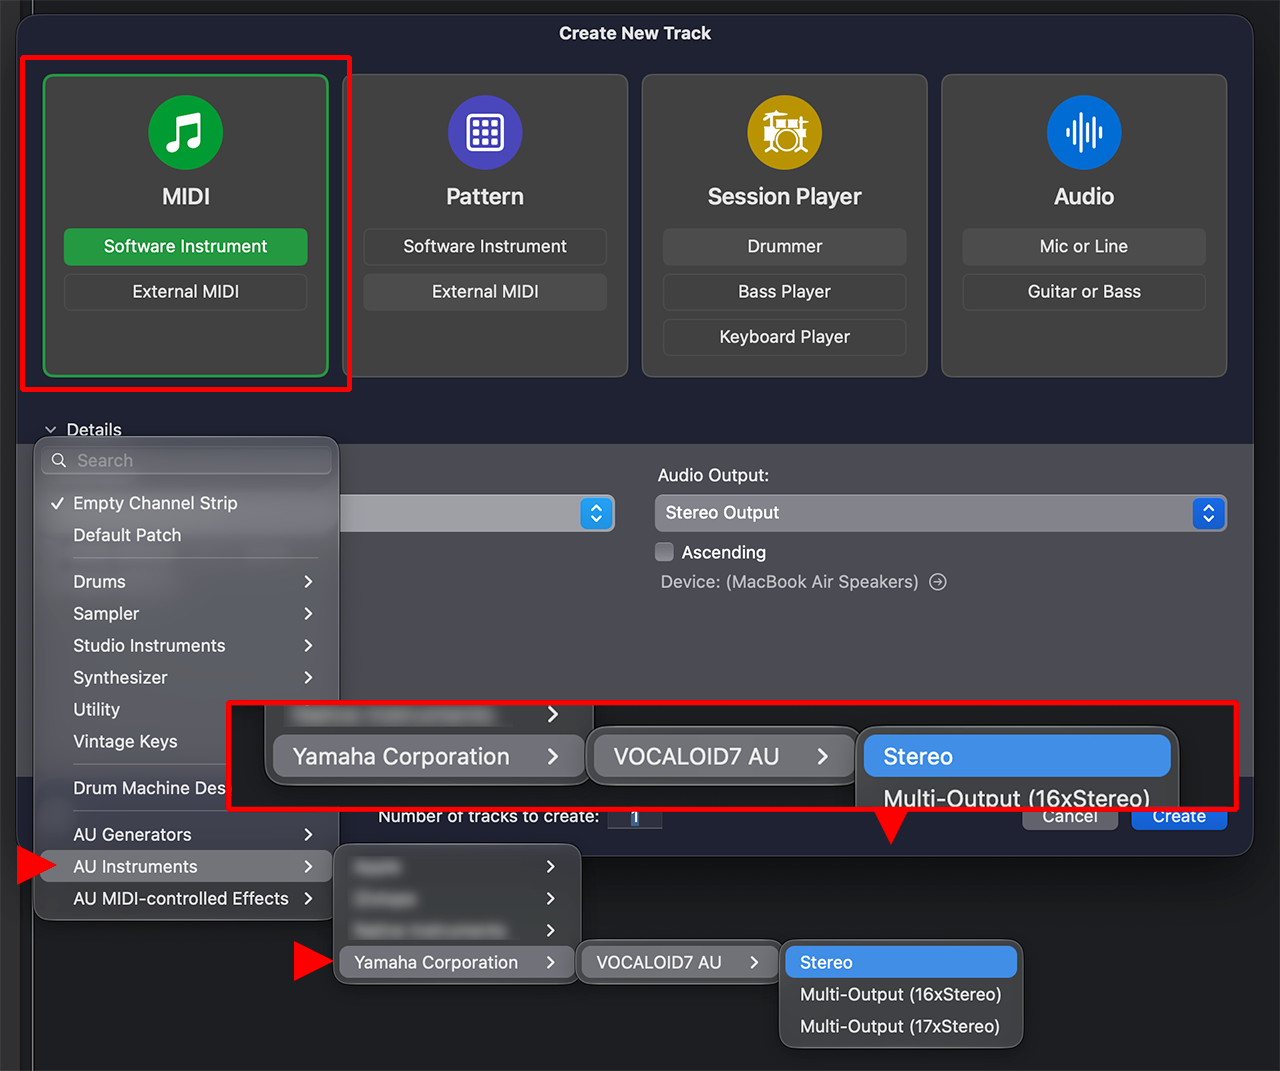
When the project opens, the Choose a track type window will appear. Select [MIDI > Software Instrument].
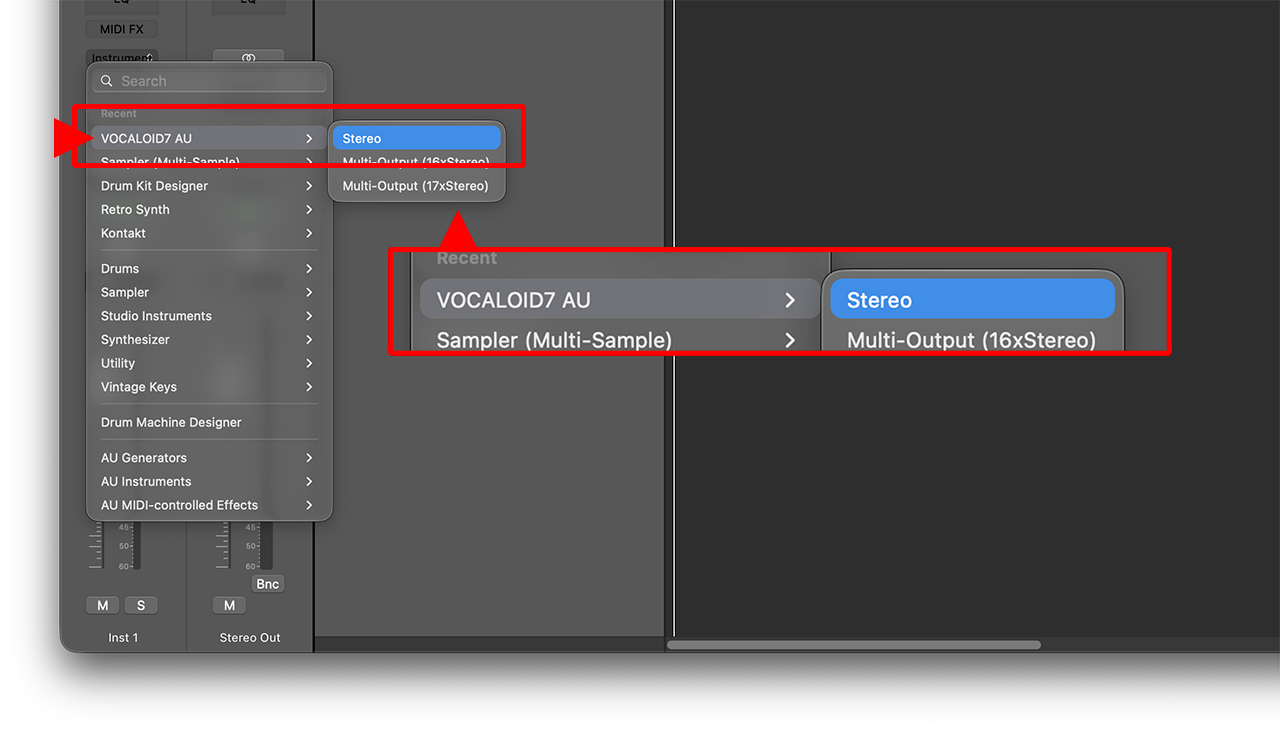
Click the [Instruments:] menu in the Details section, select [AU Instruments → Yamaha Corporation → VOCALOID AU → Stereo], and click the [Create] button.
4.Configure VOCALOID Bridge
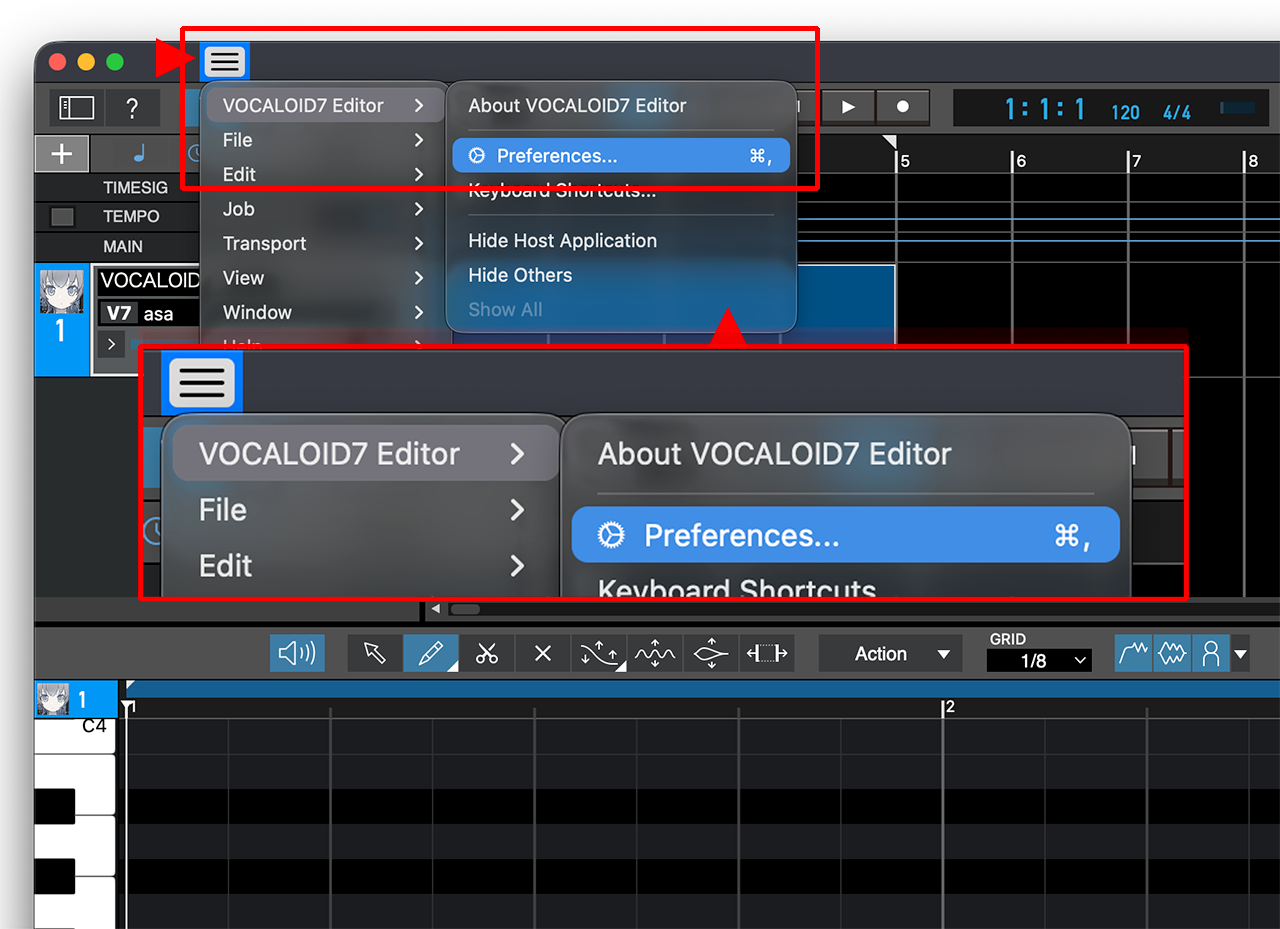
From the menu of the launched VOCALOID AU, open [VOCALOID7 Editor → Preferences].
Select [Details], and check the box for "Allow connection with VOCALOID Bridge plugin."
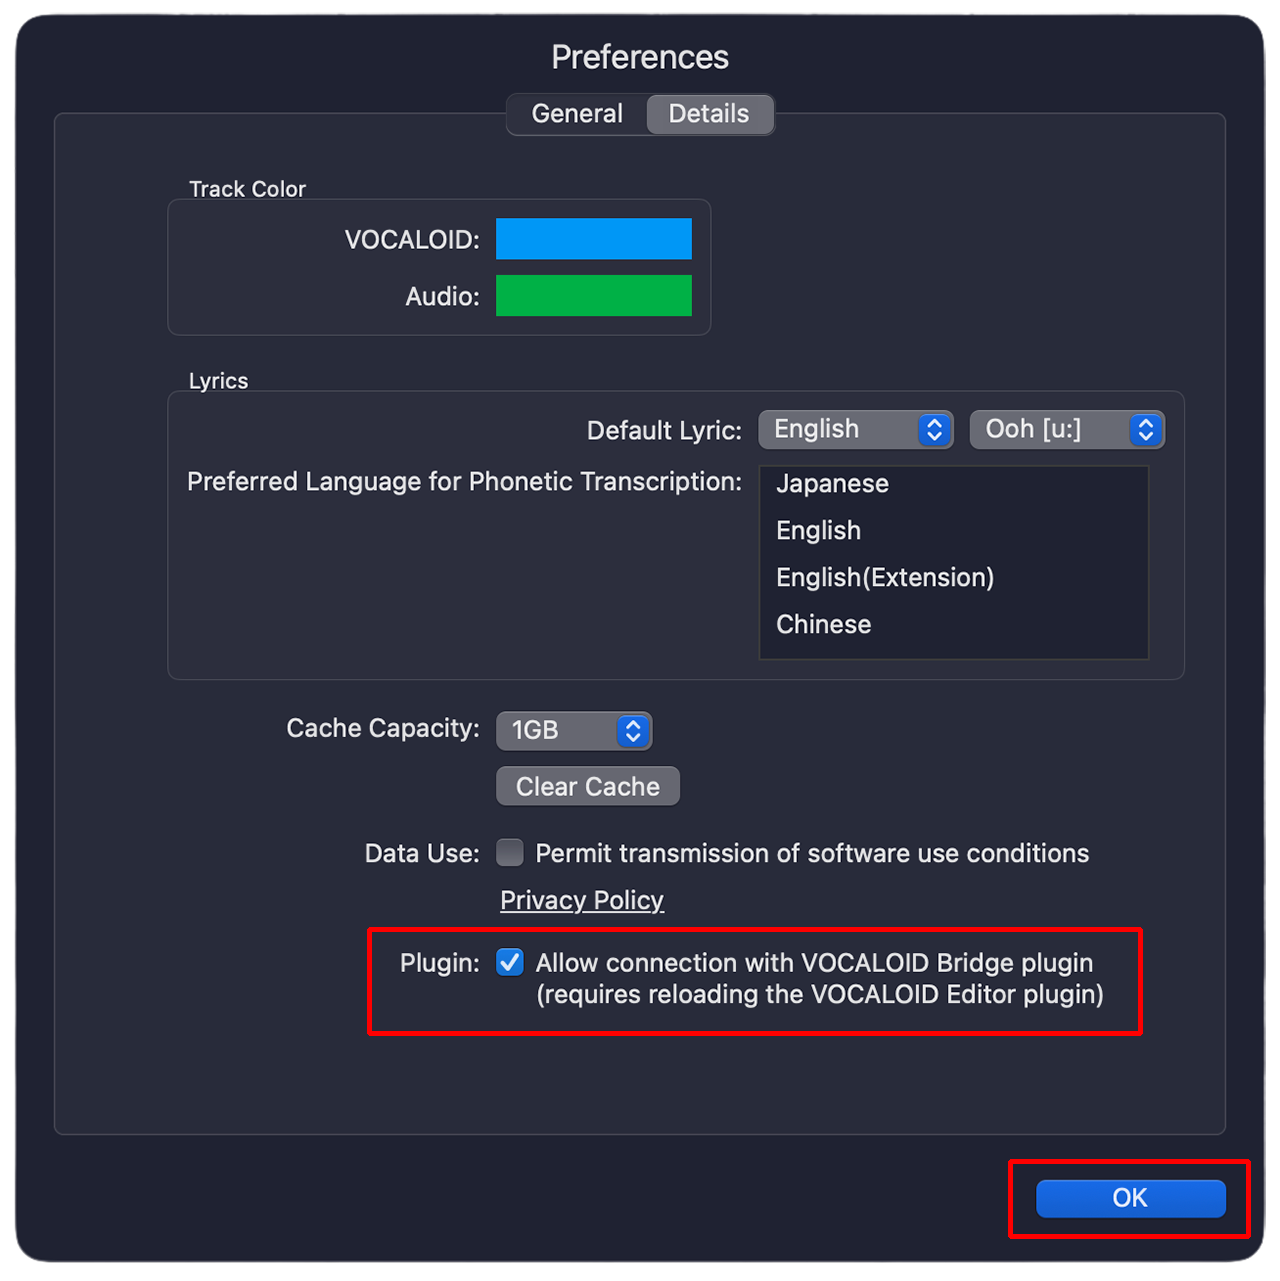
After checking the box, you need to reload the VOCALOID AU plugin. Close [Preferences] and select [No Plugin] from the instrument slot.
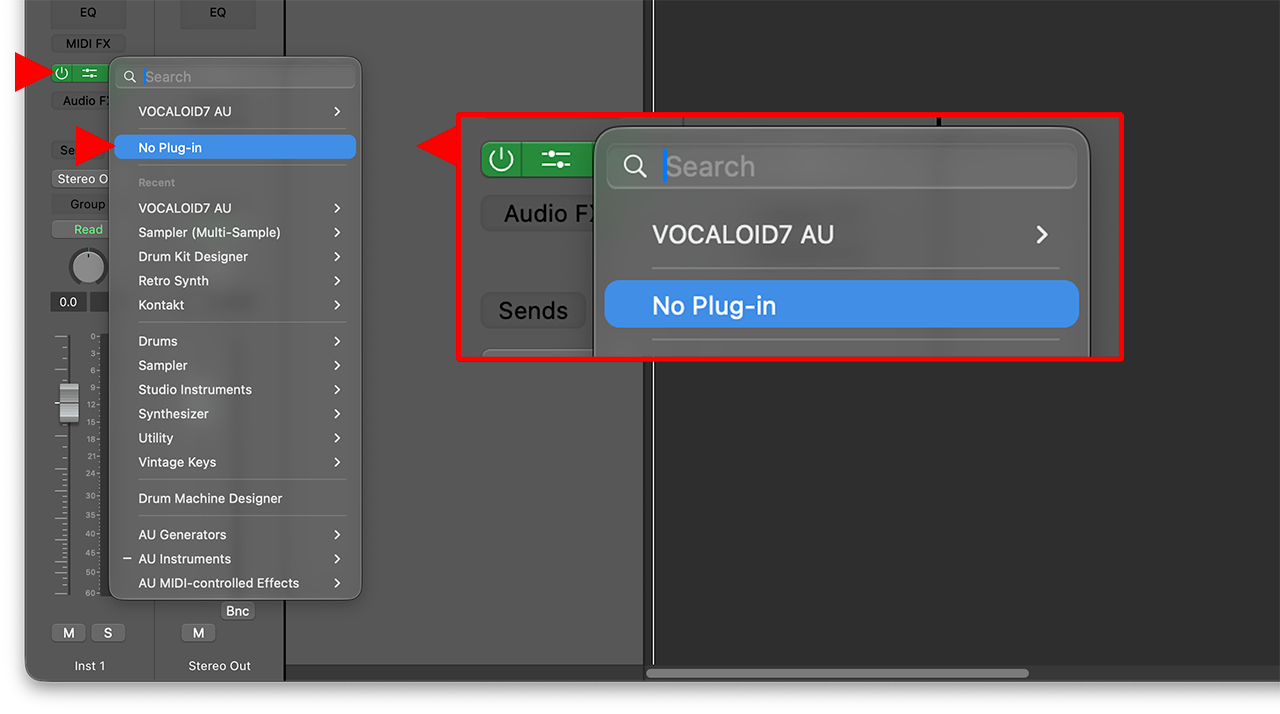
Select [VOCALOID AU → Stereo] from the instrument slot once again.
5. Configure ARA2
Next, let's set up "ARA2", which is required to synchronize playback between Logic Pro and VOCALOID7 Editor.
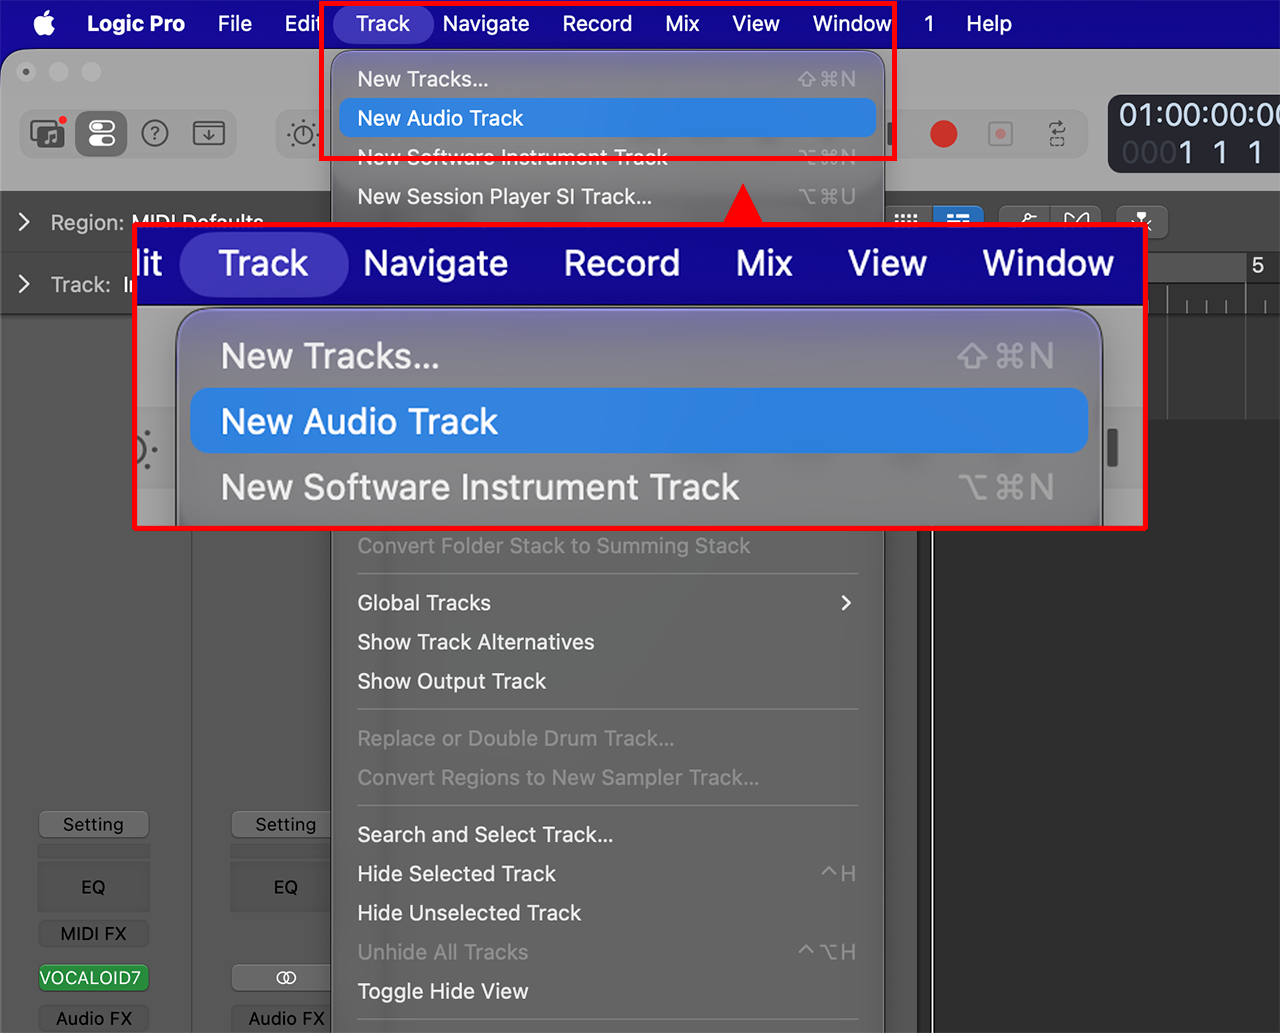
Create an audio track in Logic Pro. Select [Track → New Audio Track].
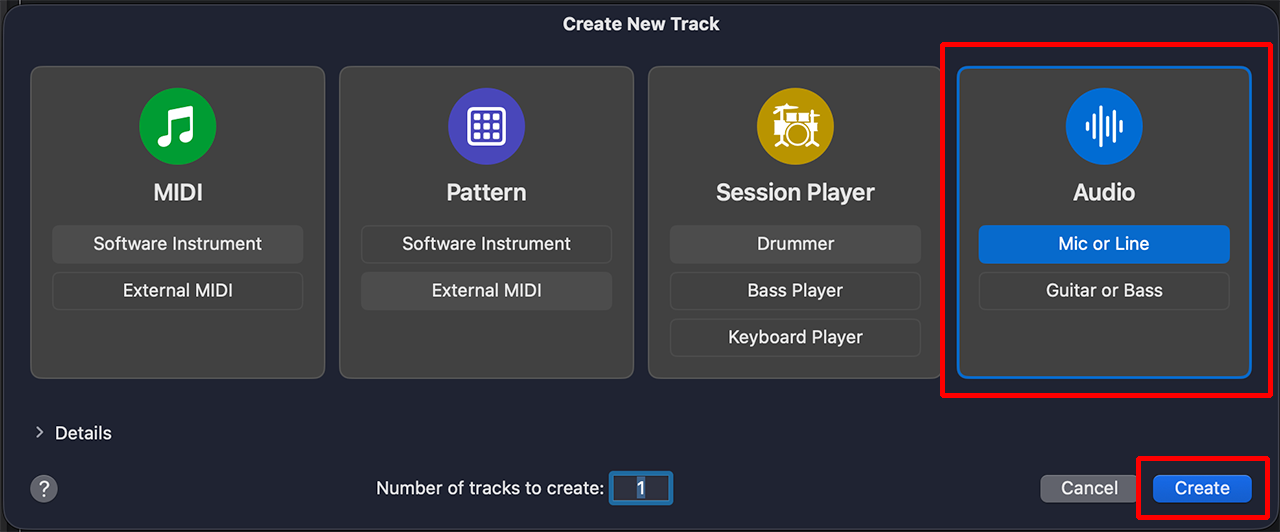
If you create a track by selecting [Audio] in the Choose a track type window, select [Mic or Line].
Open Inspector or Mixer of Logic Pro.
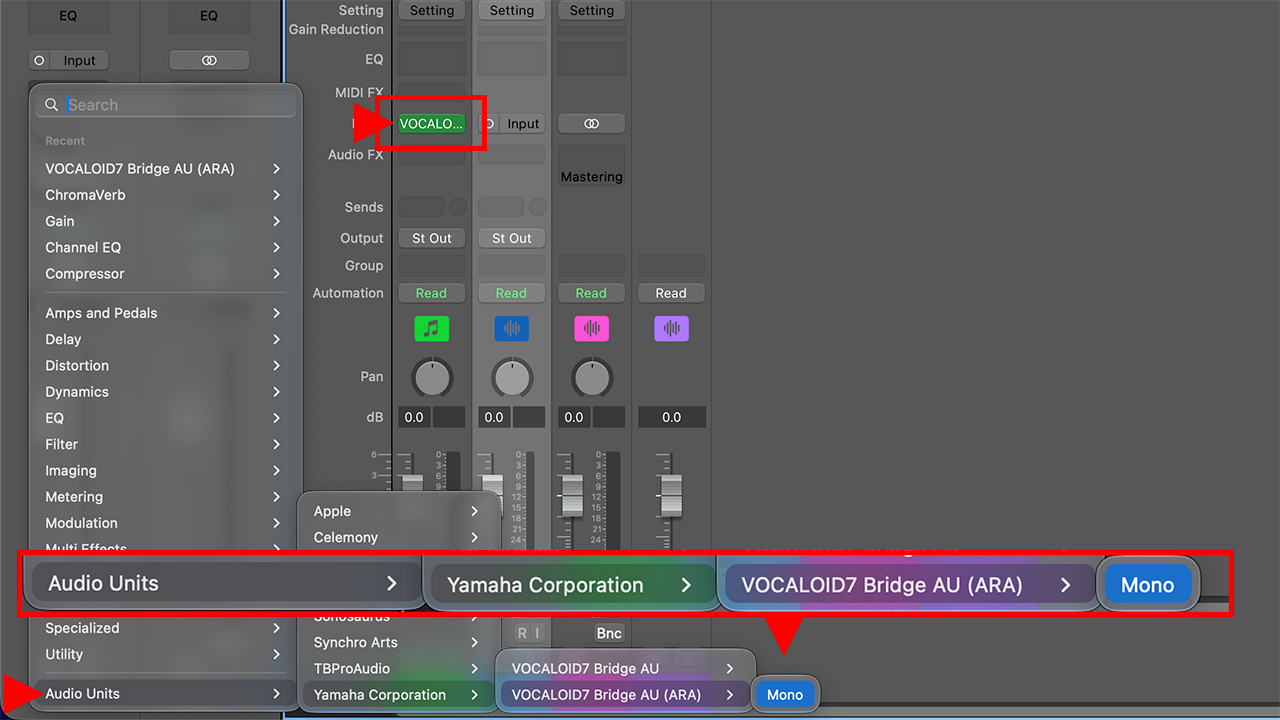
Click the top slot in the Audio FX section of the created audio track, and select [Audio Units → Yamaha Corporation → VOCALOID7 Bridge AU(ARA) → Stereo (or Mono)].
- Note: Be sure to select the very top Audio FX slot. If you select the second slot or below, [VOCALOID Bridge AU(ARA)] will not be available.
This completes the setup.
If "VOCALOID Bridge Connected" is displayed on the screen of the VOCALOID AU created in Step 3, the configuration is complete.
6. Confirm operation
Finally, let's verify whether VOCALOID7 Editor and ARA2 are working properly.
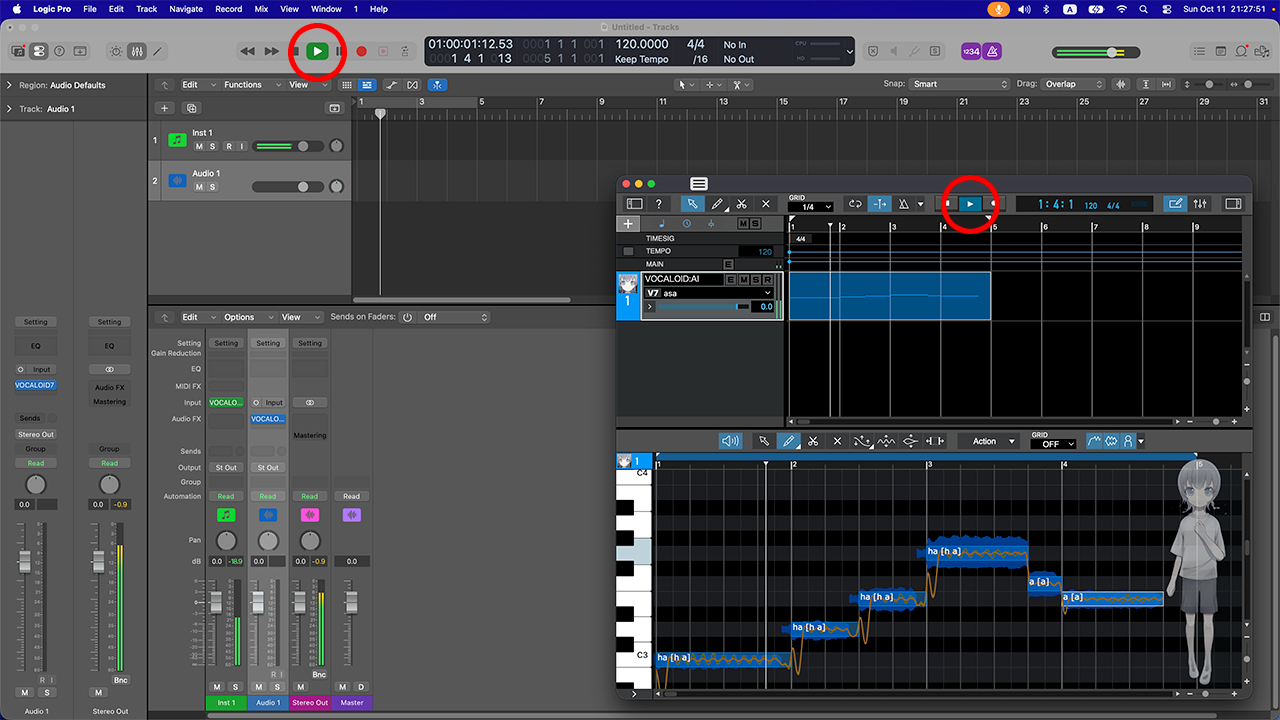
Click the play button in Logic Pro to play and stop the project. VOCALOID7 Editor will play and stop in sync with Logic Pro.
Click the play button in VOCALOID7 Editor. Logic Pro will play and stop in sync with VOCALOID7 Editor.
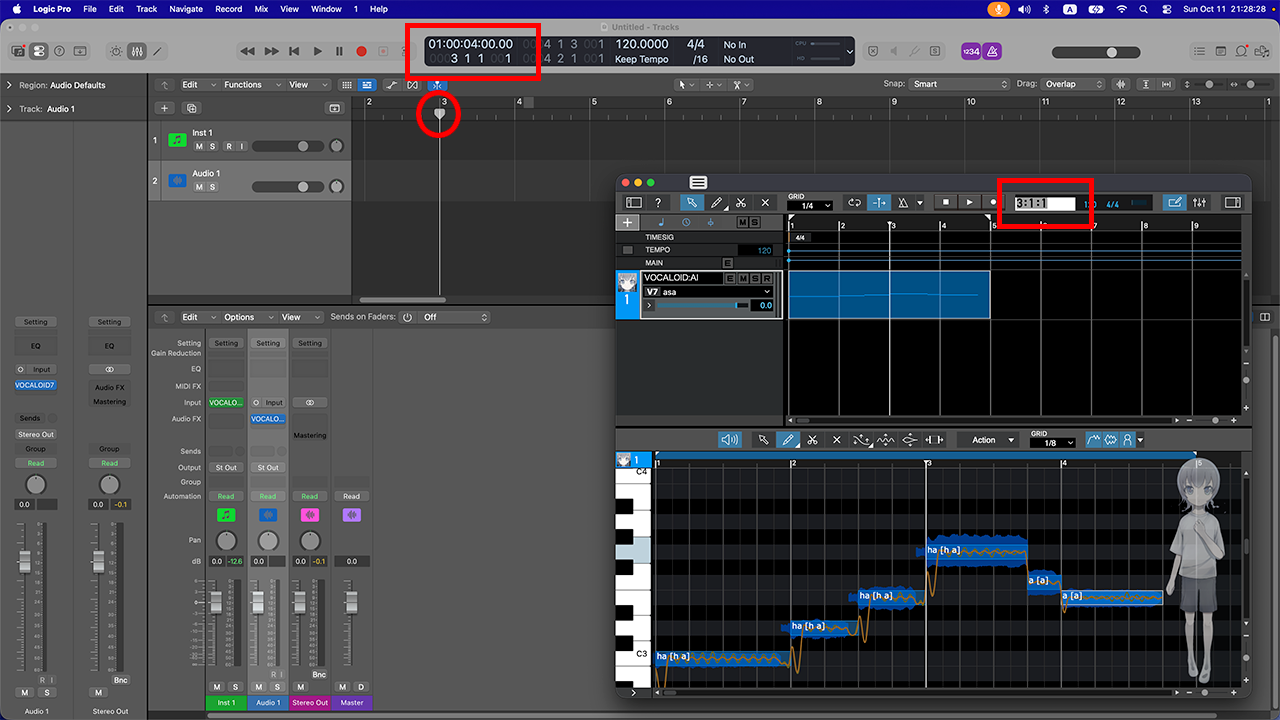
Change the playback position in VOCALOID7 Editor. Logic Pro's playback position will follow VOCALOID7 Editor.
You can change the playback position by clicking the ruler at the top of the screen (the area displaying bar numbers like 1, 2, 3, 4) with your mouse.
Additionally, repeat playback settings are also synchronized.
- You cannot change the tempo setting from VOCALOID7 Editor. Please adjust all tempo settings within Logic Pro.
This completes the setup and operation check in Logic Pro.